Easy as Eins, Zwei, Drei

hamwiches 007      Snow pouring from the sky yet again was bringing on an alpine vibe. I was feeling like a true housefrau, stuck inside the chalet with my Hummel figurines and Wagner CDs. For lunch, it seemed only appropriate I whip up a little Deutschland-esque fare. After a quick inspection of my Old Food files, I decided upon a recipe that  matched my Stuttgart state of mind–German Poppy Seed Hamwiches.

I can’t say for certain Germans eat sandwiches exactly this way, but the ingredients—horseradish, mustard, ham, cheese and rye bread–certainly qualify as German inspired. This recipe comes from the old Home Economics department at Parkland High School, just outside Allentown, Pennsylvania. A friend of mine there, assistant principal Donna Steckel, copied the department’s entire recipe archive just for me. She reports that the PHS collection dates back to the 60s and 70s and may have been used by home ec. teacher Sarah Harding. I can understand why this recipe made the cut for her classes. It’s simple, requires only beginner-level kitchen skills, includes interesting ingredients and yields hot sandwiches with a twist. These weren’t the slightly damp, white-bread grilled cheese students found in their school cafeteria. These had a bit of zip and  incorporated condiments more associated with adult palates. There’s no way I would have voluntarily consumed horseradish or spicy mustard as a teenager, so I appreciate how this recipe took her students outside their culinary comfort zones. Come to think of it, I enjoyed this grilled cheese 2.0. A nice change from the routine.

hamwiches 010 

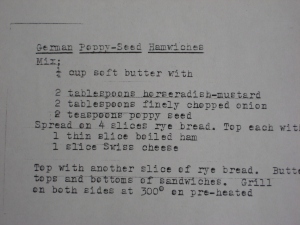
German Poppy Seed Hamwiches

Mix:

1/4 cup soft butter

2 tablespoons horseradish mustard

2 tablespoons finely chopped onion (I used a red onion)

2 teaspoons poppy seed

(You’ll have lots left over if you’re only making a single sandwich with two slices of bread.)

hamwiches 003

  Spread on two slices of rye bread (I used a marbled pumpernickel-rye). Top with:

1 thin slice ham

1 slice Swiss cheese

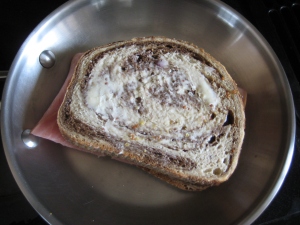
Top with another slice of rye bread. Butter tops and bottoms of sandwiches. Grill on both sides at 300 degrees on pre-heated electric griddle or fry pan until hot and cheese is melted.

hamwiches 008

Pass extra poppy seed butter. Wunderbar.

hamwiches 022

Snow Day Apple Pie

applepie 021

My coping strategies for yet another snow day–this one coated in ice–are almost depleted. I’ve done puzzles, read several books and caught up with all the wash and my e-mail.  Naturally, I fled to the kitchen.  It was time for pie.

Apple pie, in particular. I needed comfort. I wanted cinnamon-spiced air to envelope me. I yearned for a slice of a summer day. So yeah,  pie was the answer.

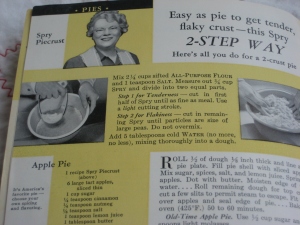
This Spry recipe booklet from 1942 has been tempting me for months. The kindly older woman on the cover is Aunt Jenny, Spry’s spokesmodel of the day. She was created as part of the advertising campaign against Crisco (which is what I’m using today) and apparently had great success luring customers to Spry. Her homespun, folksy tone was featured in a popular radio show and of course, promotional materials like the booklet below.

applepie 007Aunt Jenny’s got a bit of a pastry secret inside:

applepie 003Her recipe included an extra step that was new to me, and it promised a flaky result. Since I’m far from a pastry maestro, perhaps Aunt Jenny knew something I didn’t. Here are her instructions for a one-crust pie:

Spry (or Crisco) Pie Shell

Mix 1 1/4 cups sifted all-purpose flour and 1/2 teaspoon salt. Measure out 7 tablespoons Spry and divide into two equal parts. Two parts? Two steps? This was all new to me, but I followed along willingly.

Step 1: For Tenderness:  Cut in first half of Spry until fine as meal. Be sure to use a light cutting stroke (I used a fork).

applepie 010Step 2: For Flakiness: Cut in remaining Spry until particles are size of large peas (I went back to my best pastry-making tool—my hands).  Do not overmix.
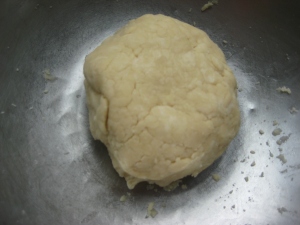
  Add 3 tablespoons cold water (no more, no less), mixing thoroughly into a dough.

applepie 012Roll 1/8 inch thick  and place dough in a 9-inch pie plate.

Now , on to the filling:

Apple Pie

6 large tart apples (I used 8 medium and sliced in chunks)

1 cup sugar

1/4 teaspoon cinnamon

1/4 teaspoon nutmeg

1/8 teaspoon salt

1 teaspoon lemon juice

1 tablespoon butter

  The recipe directs you to first fill the pie shell with sliced apples. BUT I went off Aunt Jenny’s pie reservation here and did things differently. Why? Because of my mother, the best pie maker EVAH.

   She always added flour to the bottom of the pie before mounding the apples inside the pie plate. Those juicy apples will release lots of liquid and you want, you crave that thick gooey pie (plasma?) globbing around inside. So, I added 1 tablespoon of flour to the bottom of the pie and added another 1-2 tablespoons to the sugar-spice mixture above.

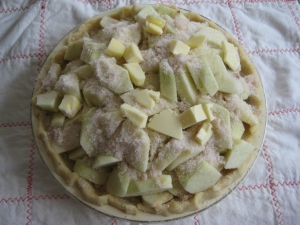
   Mix sugar, spices,  flour, salt and lemon juice. Sprinkle over the apple slices as you gradually layer on the fruit. Dot with butter.

applepie 013

Bake in 425 degree oven 50-60 minutes.  I lowered the oven to 400 after 45 minutes and baked the pie a total of 65-70 minutes.

The results: Aunt Jenny’s two-step method was a winner, and I believe the crust was the best I’ve ever made. It certainly was the flakiest crust I ever turned out. I should know because I did exhaustive taste testing afterward. I had pie for a late-afternoon snack and then again as a dinner entree later that night. Now don’t tsk, tsk. I’m in good company. The highly authoritative American Pie Council reports that “pie just isn’t for after-dinner dessert. Thirty-five percent of Americans say they’ve had pies for breakfast; pies as lunch (66 percent) and midnight snacks (59 percent).”

  Furthermore, I joined the tribe (32 percent of Americans) who prefer no crust on top of their pie (we all cut down where we can, don’t we?) and the 90 percent who agree that a slice of pie represents one of the simple pleasures of life. To quote a famous, fastidious food and style diva: ‘Pie–it’s a good thing.’

P.S. Thankfully, there’s a statistic I didn’t replicate today:  1 in 5  Americans have eaten an entire pie by themselves.

Diner Delights at Home

chickencro 032

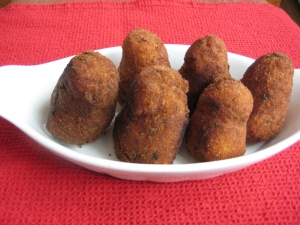
Chicken croquettes = diner food, agree? After today’s 1948 Old Food Cooking lab–inspired by a booklet from Planter’s Peanut Oil– I’m bringing them off the interstate. From now on these croquettes will be my new go-to recipe for leftover chicken or turkey. The results bettered any croquette I’ve consumed in a diner locally, and that’s saying somethin’ considering I live in a diner hotspot in south central PA. That’s all I order whenever I eat out at Esther’s or Kumm Esse or Risser’s or Midway Diner.  They normally arrive on a plate with chicken gravy and filling/stuffing and perhaps a small dish of the vegetable special. I didn’t whip up all the sides for my lunch today, and I was wondering if I’d miss the gravy. But, no, not so much. This batch had a savory, creamy filling with a  uber-crunchy crust. In fact, these croquettes lived up to the French word  croqu, “to crunch,” which is how they got their name.  And for you deep-fry skeptics let me assure you. These were not a bit greasy.  The crust felt like sandpaper  seconds after emerging from the hot oil, and the paper towels I used to absorb grease  got only a light workout.

chickencro 013

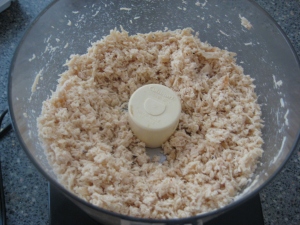
I can’t say that the croquettes were a quick meal to pull together. There were several steps that I spread out over two days. Because I didn’t have any leftover meat, I roasted two, bone-in chicken breast halves. After they cooled and I removed the meat from the bones, I minced the chicken and measured out two cups.

spycroque 028Later on I needed to make a simple white sauce to bind the meat and seasonings and then allow it to chill and set. The following day I shaped and fried the croquettes, which actually took less than five minutes. Quick service, just like the diner actually.  Here’s the entire recipe:

spycroque 005

Chicken Croquettes

2 tablespoons Planters Peanut Oil

2 teaspoons onion, minced

4 tablespoons flour

1 teaspoon salt

1/8 teaspoon pepper

1 cup milk

2 cups cooked chicken or turkey, minced

1 teaspoon parsley, minced

Finely ground dry bread crumbs

1 egg

2 tablespoons milk or water

Deep hot Planters Peanut Oil

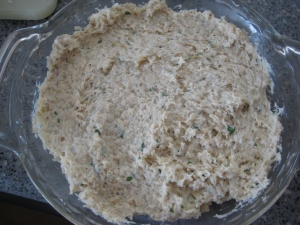
  Heat Planters Peanut Oil, add minced onion and fry until lightly browned. Blend in flour, salt and pepper. Add milk gradually and cook stirring constantly until mixture thickens. Then add chicken and parsley.  Chill thoroughly (I spread the mixture in a pie plate and placed it in the refrigerator to chill).chickencro 001

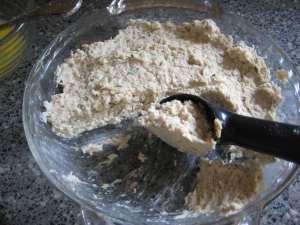
   Form into croquettes. Roll in crumbs, then in beaten egg combined with the water and again in the crumbs.  (I used an ice cream scoop to portion out the chilled mixture before breading and shaping the croquettes.

chickencro 003

chickencro 012

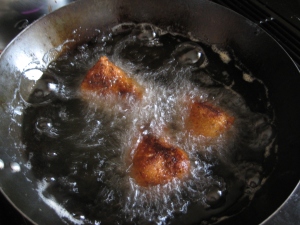
  Fry in deep Planters Peanut Oil (370 degrees) until golden brown. Drain on absorbent paper. Recipe yield: 6-8; I made mine smaller and had 10. These made a quick, delicious hot lunch. For a dinner entree, next time I’ll make a simple gravy from the roast chicken breasts and serve as an optional topping, just like at Esther’s. Mashed potatoes or stuffing plus a side veggie will round out the meal.

chickencro 026

Six Degrees of Desperation

cornbread 029That’s six degrees of heat, as in Fahrenheit–the temperature outside my dining room window. The one that looks out on the arctic landscape that is Pennsylvania these last two days.  Yes, these are dark, drafty, desperate times. Can you think of a better reason to crank up the oven to 425?

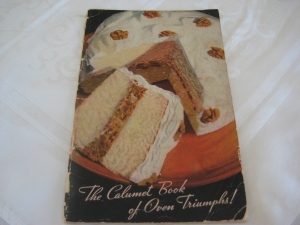
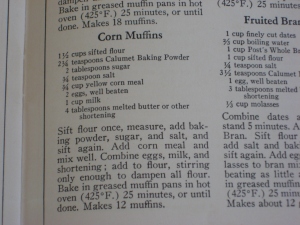
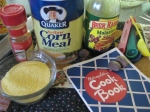
I planned on sharing some crock pot beef stew (sorry, no vintage connection there) with a neighbor and wanted a bread-y accompaniment.  After consulting The Calumet Book of Oven Triumphs from 1934, I found the perfect side–corn muffins. The basic recipe yielded only a dozen muffins (hey, who needs to be overrun with 24 muffins when you’ve got time to fill on a wickedly cold day? One butter-covered half leads to a second, which leads……) and was easy to prepare. The only step that ate up a few more seconds of my time was sifting the ingredients twice. Not a problem. Where was I going anyway? I had no plans to leave the igloo.

cornbread 008

cornbread 011

Corn Muffins

1 1/2 cups sifted flour

2 1/4 teaspoons baking powder

2 tablespoons sugar

3/4 teaspoon salt

3/4 cup yellow cornmeal

2 eggs, well beaten

1 cup milk

4 tablespoons melted butter or other shortening (I used butter)

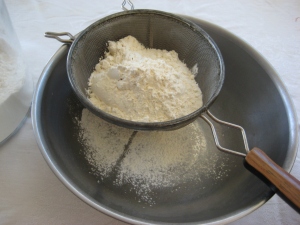
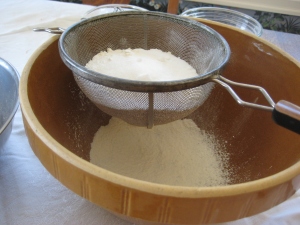
  Sift flour once,

cornbread 015

measure, add baking powder, sugar, and salt, and sift again.

cornbread 017Add cornmeal and mix well. Combine eggs, milk and shortening; add to flour, stirring only enough to dampen all flour.

cornbread 022

Note: Don’t overmix. I actually used my fork to lightly combine the wet and dry ingredients. There is still a bit of flour visible in my batter. I get a bit paranoid and hate to overdo it.
Bake in greased muffin pans (I used cupcake liners) in 425 degree oven 25 minutes, or until done. (I baked mine only 18 minutes). Makes 12 muffins.

cornbread 024

And then they were done, each muffin like a miniature sun, beaming warmth aimed right at my face (I’ll do anything to keep me positive in January, even fantasize about astronomy). A few minutes later, I packed them up with the stew and was doing my best Little Red Riding Hood routine to deliver the food. The temp had risen to 8 degrees. Perfect day for a walk.

Tossie Time

Christmas 084

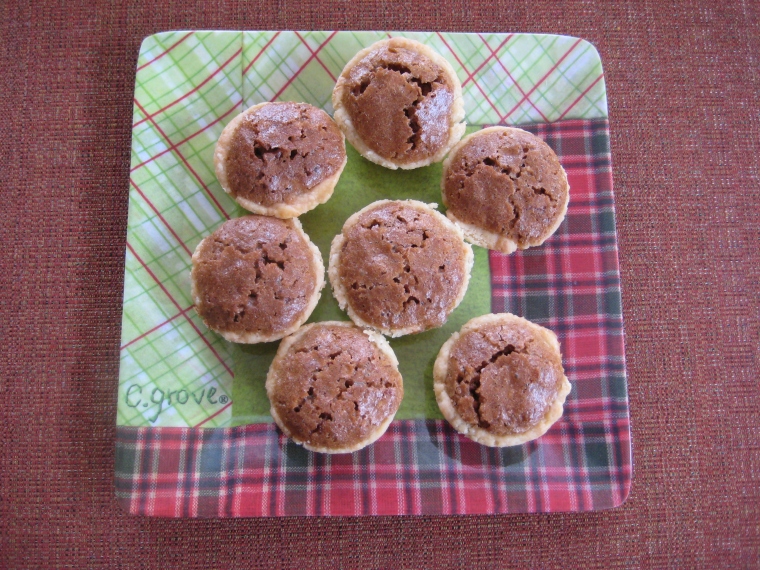
If you like gooey combined with slightly chewy all inside a tiny nest of flaky pastry, you must learn the way of the pecan tossie. Or tassie.  I acknowledge both spellings and pronunciations that refer to this Christmas cookie-pecan pie hybrid that has become my holiday cookie superstar. It claims the middle of the cookie platter I serve for dessert after our Christmas dinner and gets boxed and wrapped for many gifts. Tossies are rich, delicious, a little bit fancy and more work than a Christmas cookie should require.

But once a year, I’ll go the extra mile. The recipe is a tried and true hand-me-down from my Nana, Martha Roberts, who was without question the family’s best baker. Cakes, quick breads, cookies. She did it all and did it superbly. In other words, you can count on the source.

The recipe has two parts–the crust and the filling.  And yes, it’s the crust that you’ll need to master in order to become a tossie queen yourself. Although I don’t remember being in the kitchen when Nana made these, during the past 25 years or so I’ve developed my own little techniques and tricks that make tossie assembly and removal from the pan a lot easier than it was in the beginning. Remember to keep the dough cool when handling and don’t rush the last part. Let these little pecan pies cool a bit in the pan before you begin jabbing them with a knife. Be gentle. Be delicate. Don’t break the flake.

Martha Roberts’s Pecan Tossies

 Crust

1 stick butter

3 oz. cream cheese                                                                                   Christmas 010

1 cup flour

    Mix together until ingredients are blended and form a soft ball of dough. Refrigerate for several hours.

Christmas 008

The dough is easier to handle when cool, and I sometimes make the dough days in advance. I allow the dough to sit at room temp for 1-2 hours before handling and forming into crusts. If the dough becomes too soft it will be impossible to mold into the mini-muffin pans.

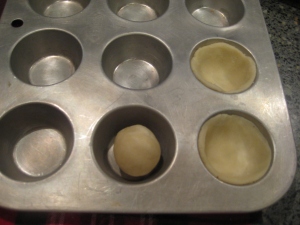
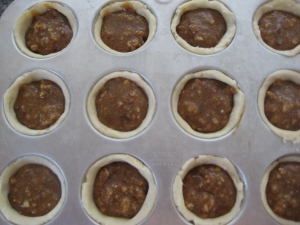
 Each crust begins with a small ball of dough about the size of a small walnut. I use my middle finger to press the dough down and around into the muffin tin, being careful to keep the dough neither too thin or too thick. If the dough is too thin the filling may seep out; if it’s too thick there will be less room for the filling.
Christmas 043

 After I form the pastry shells I return the muffin tins to the refrigerator until the dough is cold.

Filling

1 extra large egg, slightly beaten

1 T. butter, softened

1 cup brown sugar

1/2 cup finely chopped pecans

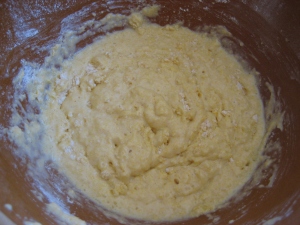
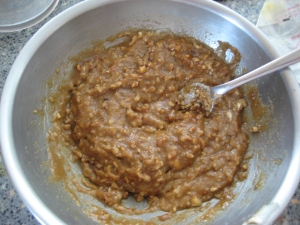
Christmas 044  Combine the ingredients and fill the pastry.

Christmas 053

 Bake in 350 degree oven for 30 minutes or until the crusts turn a light brown. I prefer uncoated aluminum pans to those with nonstick coating.

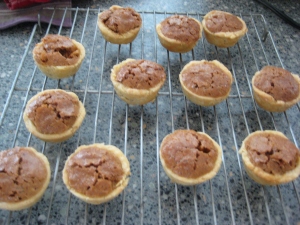
Christmas 081After the tossies come out of the oven, allow to sit for 5-10 minutes before removing them from the pan. Use a knife to gently lift them out of the pan and transfer to a wire rack to cool. Makes two dozen tossies.

The No Canned Soup, Deluxe Tuna Casserole

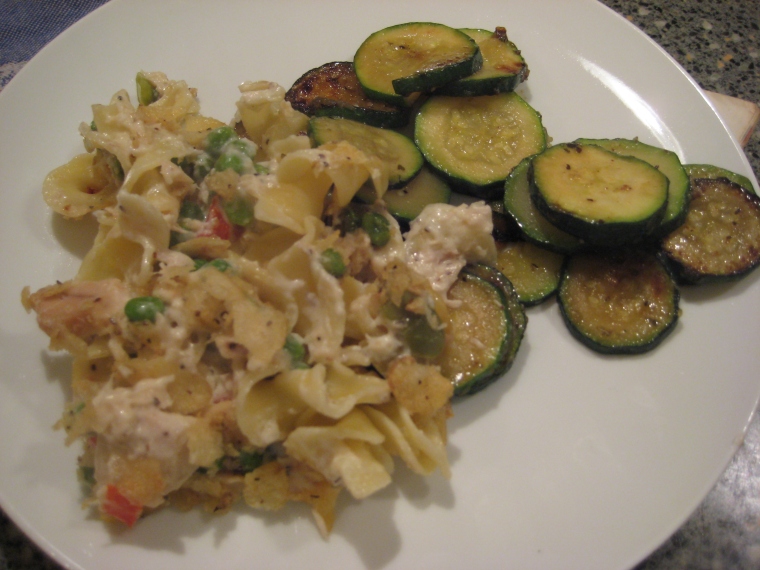
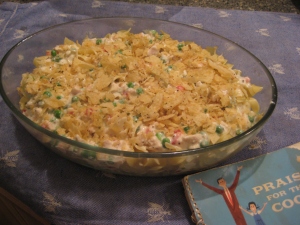
tuna 014 I hope my turkey dinner on Thursday makes me as happy as this tuna noodle casserole. I kept the Campbell’s cream of mushroom soup on the shelf but grabbed my small tin of Crisco I use exclusively for pie dough. Who knew a small amount of it would be at the base of a simple white sauce that held all these new and scrumptious ingredients together. This was no flashback to a Friday in 1965 at my school cafeteria.  No kid I knew then or now would like his perfectly good casserole ruined with red and green thing-ies. Pimiento? No way. Olives? Yuck.

Oh, no, no, no. This is not the tuna noodle from my school or childhood kitchen table. My Mom served it regularly, but this is better. Dare I say luxe?  This is tuna casserole for grown ups. Even better,  I’ll have plenty leftover for tomorrow night when I begin to lose my mind preparing the stuffing and roasting extra turkey pieces in advance for the gravy. Thanksgiving Eve cooking is all about the dinner the next day. Cook supper on Wednesday? Ahhhh. No.

Tonight’s supper was just so much better than what I was expecting. I think I would have preferred a bit more creaminess, but the flavors and textures were perfect. I loved the salty additions of the green olives, as well as the  crunch from the chips on top (my mother would have never gone for the chips. And my brother, Dad and I would have probably demolished the chips before supper. We were wolves, really.)

I found the recipe in the “Feeding the Crowd” chapter of a spiral bound, 1959 Crisco  publication called “Praise the Cook.” My husband bought it at a flea market a few months ago, and I happily added it to the Old Food library. Many of its 120 pages are yellowed and stained and spotted—almost like the cook who owned it before is giving me a sign. The smudgier the book, the greater likelihood of good stuff inside.

tuna 001   There were two versions of the recipe–one to feed 12 and one to feed 24.  But there was only my husband and I, and I wanted leftovers. Cutting the 12 servings in half made sense. If you’re squeamish about using the Crisco, 2013’s version of the product has 0 grams of trans fat and half the saturated fat of butter. And, my reduced-serving recipe required only 1 1/2 tablespoons. For six servings? A pittance.

I bought Bumble Bee solid white tuna in water (American Heart Association certified), and assembled the remaining ingredients from my pantry: green olives, chopped pimientos, and peas. I never missed the cream of mushroom soup either, although next time I’ll add more milk to make the casserole wetter. Here’s my version, which will serve 6

Tuna Noodle Casserole

4 oz. noodles ( I upped it to 6 oz.)

1 1/2 tablespoons Crisco

1 1/2 tablespoons flour

1 1/2 c. milk (I’ll use 2 next time)

1 1/2 cups tuna (I used two, five-oz. cans of solid white in water)

2 tablespoons chopped pimiento

2 tablespoons chopped green olives

1 cup  petite peas (original recipe called for peas to be cooked and drained; I just added them frozen)

salt and pepper to taste

1/2 cup corn flakes (I used kettle-cooked potato chips with cracked black pepper. So good)

   Cook noodles in boiling salted water until tender (I undercooked them by a minute or two). Drain. Melt Crisco in saucepan, stir in flour and add milk. Cook until sauce comes to a boil and is slightly thickened. Combine with tuna, pimiento, olives, peas, salt and pepper.

tuna 002Place alternate layers of cooked noodles (I started with noodles) and tuna mixture in a baking dish that has been rubbed with Crisco (Geez, I can remember my Mom doing that but I used cooking spray). Bake in moderate oven, 350 degrees, for 30-35 minutes.

tuna 006

Happy National Indian Pudding Day

novemberpics 021Aw, you didn’t get your cards out?

No worries. There’s always next year. But you can still have your pudding if you’ve got a well-stocked pantry, a quart of milk in the fridge, and a block of time this afternoon to mix it up and throw it in the oven. If it’s the first time you’re celebrating, better continue reading. Ye olde Indian pudding has deep connections to early America and our Thanksgiving traditions. This is Old, Old, Old Food cooking today.

Now, if you’re from the Northeast, the taste and tale of Indian pudding is probably old hat. You grew up with the stuff, and according to Kathleen Wall, culinary historian at Plimoth Plantation in Plymouth, Massachusetts, even John Adams relished a warm bowl of it back in the day. She explained that the first settlers in New England couldn’t duplicate their hasty pudding from home because they had no grain. Cornmeal—or Indian meal–was available, so a new dessert was born with a title venerating its essential new ingredient.

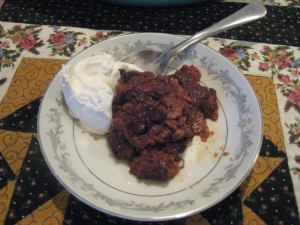
Indian Pudding recipes have been passed down through the ages, and Wall told me that if you’re a a true New England  foodie,  you’ll serve apple, pumpkin, mince and cranberry pies plus an Indian Pudding on Thanksgiving day. I’ve always lived in Pennsylvania and never heard of Indian Pudding. Being a Thanksgiving traditionalist myself, I wanted to catch up. A few days ago I made a trial batch and loved it. Notice that crust on the pudding? It tastes just like a chewy molasses cookie. I used a deep-flavored molasses and next time (yes, there will be a next time) I’ll try a gentler version for a milder molasses kick.

The following recipe comes compliments of the Metropolitan Insurance Co. Cookbook, 1948.  Despite its custard-y finish, this recipe has no eggs.

Indian Pudding

novemberpics 003

4 cups milk

1/3 cup cornmeal

1/4 cup sugar

1/2 teaspoon cinnamon

1/4 teaspoon nutmeg

1/2 teaspoon salt

1/2 cup molasses

2 tablespoons butter

     Scald 3 cups of the milk in the top of a double boiler. Add cornmeal, sugar, spices, salt, molasses and butter. Cook over boiling water, stirring constantly until the mixture thickens or for about 20 minutes. Pour into a greased baking pan. Add the remaining cup of milk, without stirring. Bake in a slow oven (300 degrees) for about 2 1/2 hours. Serve warm with milk or cream or ice cream. Yield: 6-8 servings.

novemberpics 028

War and Peace Lamb Shank Stew

In honor of Veterans Day, I’m dedicating today’s post to those who served and those who cooked, especially during the meat-deprived WWII years.  Back in ’43, the year this Betty Crocker food-buying and recipe booklet was  published, women in charge of family meals  were told they were soldiers on the home front. “You must make a little do where there was an abundance before.” Wartime meal planning and preparation meant stretching the available meat supply, buying  less familiar cuts of meat, and slowly introducing new, yet nutrient dense food to your family.

novemberpics 031

“The big concern when the war started was that it would last a long time,” explains Brian Wansink, an eating behavior specialist at Cornell University who wrote about changing eating habits on the home front back in 2002. “Beef and pork were sent overseas to either feed our troops or our allies. And at that point people didn’t really eat fish and chicken, so the biggest threat to American health at that time was malnutrition due to lack of protein” he says. “But one thing that was plentiful was all the leftover stuff.”  You know. Liver. Kidneys. Oxtails, shanks, necks, shoulders.

Enter Uncle Sam. Dr Wansink writes that the Department of Defense asked Margaret Mead and dozens of other high-profile anthropologists, psychologists and sociologists to put their heads together and come up with a plan to change eating habits in America. The results were interesting. Turns out people conform when you remove barriers. In other words, make it easier for them to cooperate. Sell the idea that there are lots of people sacrificing for freedom. This is one thing you can do for the war effort. Also, they learned by appealing to the person who has the biggest impact on the rest of the family—THE MOTHER–the more success you’ll have. You can’t browbeat Mrs. Jones into serving liver each night of the week. It won’t work, but one or two dinners a week? OK. And it’s important to incorporate these “variety” meats (yes, that’s where they got their name) into already familiar menu items. Cookbooks became overrun with recipes for liver loaf, green peppers stuffed with liver, and liver with scalloped potatoes, just to name a few.

But here’s the thing. I can’t do liver now. I might be able to do lamb shanks, though. I found a recipe from 1943 for braised lamb shanks and combined it with a colorful post-war magazine ad for lamb stew. That relic came from my mother’s files, and when both recipes were melded with some novemberpics 035

modern ingredients, I had one patriotic masterpiece on my hands.

War and Peace Braised Lamb Shank Stew

2 pounds lamb shanks*, cut into pieces

Mix with 2 tbsp. flour, 1 tsp. salt, 1/8 tsp. pepper, 1/4 chili powder (I used Penzey’s Chili 3000) and then brown in 4 tbsp. oil. (I put the flour mixture into a plastic bag to coat all the pieces and added the leftover flour to the pot). Add 2 cups of water, 1 bay leaf and 2 cans Hunts tomato sauce. (There was no size mentioned in the original recipe, but the can in the ad looked small. I used 2 8-oz cans of roasted garlic- flavored sauce). Simmer for 1 1/4-1 1/2 hours.  Add 4 carrots, cut in medium chunks, 1/2 cup chopped onion, 1/2 cup chopped celery and cook on low for another hour. Then, just because I wanted some green, I added frozen petite peas. Here was the result:

novemberpics 061  Unbelievably, bombastically, astoundingly delicious. I cooked this stew all afternoon on low, just because. The meat was falling off the bones and melted in your mouth. The only accompaniment required is a beautiful loaf of rustic bread, which I didn’t have, but I imagined a crusty slice of sourdough sopping up all that luscious thick sauce. Maybe next time.

This recipe was created out of great scarcity and improved upon with products manufactured when our cup runneth over. It could be the most delicious creation for the blog so far. One thing I know, though, it’s a new classic for me. I’ll make it again and again this fall and winter. I’d recommend the dish for a cold weekend when you have the time to cook low and slow.

*I purchased the lamb shanks at a rural butcher’s shop and asked one of the staff to cut the shanks into two-inch pieces.

Digging Into the Idareds

idareds 033The Idareds are in, so let the baking begin.  These late-autumn apples are popping up at most central Pennsylvania fruit and roadside stands about now and are a nice change from mundane Macs: they’re bigger, redder and retain their shape better than the more familiar baking apples available in supermarkets.

Back in the mid-1990s writer Roger Yepsen published Apples, a small, beautifully illustrated book of 90 different apple varieties. I’m trying to get through them all, but some like Pitmason Pineapple, Yellow Bellflower, and Fameuse, an old-fashioned variety used for stocking stuffing at Christmas, have eluded me.  About 15 years ago I finally scored some Idareds at my favorite orchard in Lebanon County and have been buying them annually just to make baked apples. These large, finely textured apples are tart and best used for baking or applesauce, and according to page 140 in Yepsen’s book, “uncut, Idared breathes a sweet perfume. The crisp pale yellow-green flesh is juicy, fine-grained, tender, a bit tart and aromatic….”  You don’t have to be a Johnny Appleseed type to swoon over his descriptions. He describes each variety like a mouthwatering jewel, which is why I always have my apple radar up and on high alert at this time of the year. I’m lucky to have found an Idared supplier close to home.

But back to apple baking. Since I’ve documented one Old Food flop and left unrecorded a second involving purple cabbage–well, at least it was a colorful failure–I needed something old-timey yet reliable.  I followed the directions from Victor Lindlahr, author of the 1940 classic nutrition handbook You Are What You Eat.  Lindlahr threw me a curve ball with that cabbage last week, but he did give me delicious results with the blackberry pie this summer, https://oldfoodcooking.wordpress.com/2013/07/22/you-are-what-your-eat-or-i-am-blackberry-pie/  I thought he deserved a third try with this simple apple dessert, and the directions closely match how I would have done it on my own today. I learned from my Mom. And who knows, maybe she learned her technique from Lindlahr.

You Are What You Eat Baked Apples

Victor doesn’t say this but I will. I’ve never baked a Gala or Fuji or Honeycrisp–snacking apples that are the mainstay of many brown bag lunches.  I’m no apple expert but baking apples just seem to have better flavor out of the oven  Yet I suppose if you want to be an anti-establishment culinary revolutionary you can do what you want. This recipe is for a single serving, and I adjusted the ingredients for four, going a bit lighter with the sugar. Truthfully, I didn’t measure. I’m turning into my Nana.

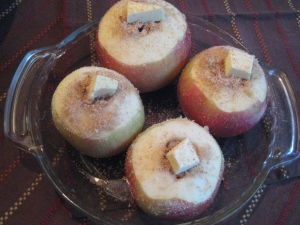
   Core and pare one-inch of skin from the top of apple. Place in baking dish and fill center of each apple with 2 tablespoons sugar (I used brown). If desired, sugar may be mixed with cinnamon or nutmeg, a few raisins or chopped nuts (I used cinnamon and walnuts and dusted nutmeg over top). Maple syrup or honey may replace sugar. Fill bottom of pan with 1/4-inch water; cover and bake in 375-degree oven(I forgot to cover, oops) until apples are soft.

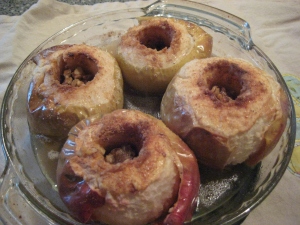
Note: My mother always added a small lump of butter to each apple and I did the same.   Also, that water you add before baking?  OOOHhh. What a lovely syrup that makes by the end. Spoon some over the apple before serving.

idareds 039

Old Food Flop #1

It was only a matter of time before I reached back too far in time and found a loser. It happened over the weekend when I attempted (and had high hopes for) Old Fashioned Rice Pudding from the Metropolitan Insurance Company cookbook. There are a lot of you out there who don’t respond well to rice pudding, but I am among the pudding base (and you lovers of all things rich and creamy know who you are) who adores the milky, starchy, ricey-ness of it.  It is comfort food at its best.

Here’s the recipe:
skinnycado 011I’m even wondering if there’s a mistake. Notice the four cups of milk on the far left, just below the 1/4 cup of rice? I had bad vibes from the start about that ratio of liquid to solids, but after three hours of cooking at low temps who knew how the ingredients might behave? I was optimistic.

I stirred the pudding every 20 minutes during the first hour—just like I was told–and there was no discernible thickening going on. But it was early. By the end of the second hour, the lemon rind and vanilla coaxed a lovely sweet aroma from the pudding dish that floated throughout the house. By hour three, I could see things hadn’t progressed. There was a thin milky skin on top and when I plunged my wooden spoon beneath the surface, hoping to meet creamy resistance, I experienced only slightly thickened milk. The rice kernels were still a bit hard, too.

Even another hour inside my oven didn’t fix things. The rice was cooked, although still a tad al dente, and the milk was as thin as ever. But here’s the thing, it tasted sooooo goooood.  The lemon rind was just enough to keep it from being too, too sweet.  I ladled it into a teacup, and who wants sweet rice soup when you’re expecting a pudding?  It was too sad to photograph. White rice soup in a white ceramic dish. A total white-out of failure.

I’m not giving up on this, especially since the soup/pudding was good enough for seconds.  I’m going to add a cup of rice next time, up the oven temp to 300 degrees and let the chips fall where they may.